Maritime Saturday Workshop - paper model of the Istrian topo
Within the framework of the long-standing European project Small Boat 2, the Maritime Museum Sergej Mašera Piran built a wooden vessel. The museum visitors had the opportunity to follow the entire boat building procedure in the former salt warehouse Monfort at Portorož.
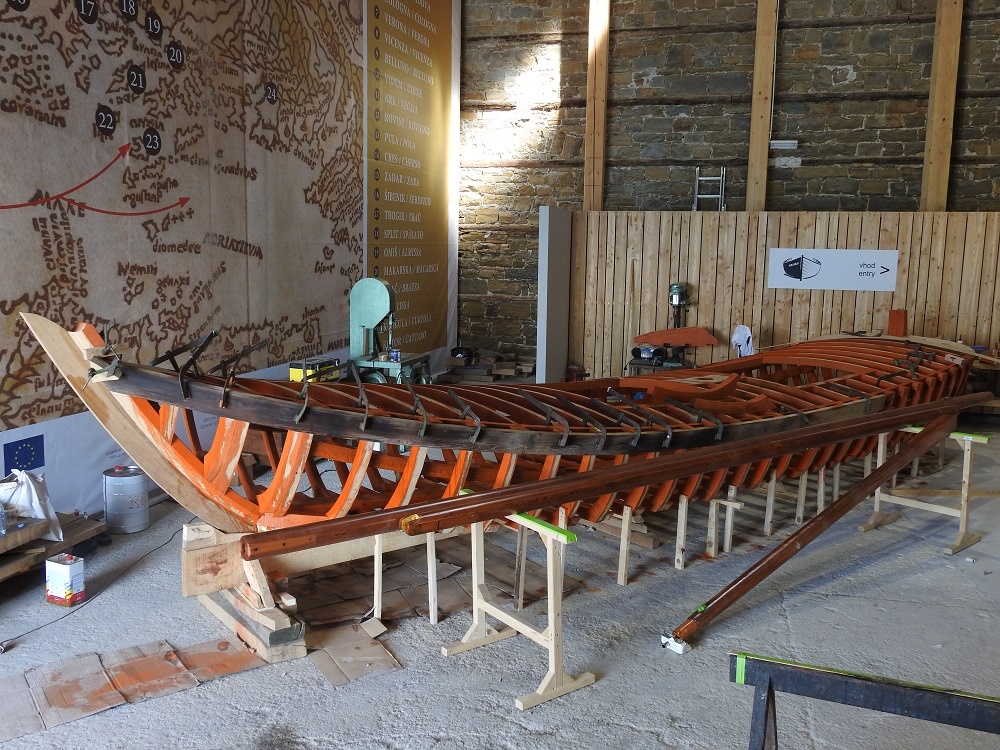
From July 2018 to March 2019, the boatbuilding masters were engaged in the making of a replica of the traditional vessel known as the Istrian topo. The Museum also holds the original vessel of this type, which once sailed in the Bay of Piran.
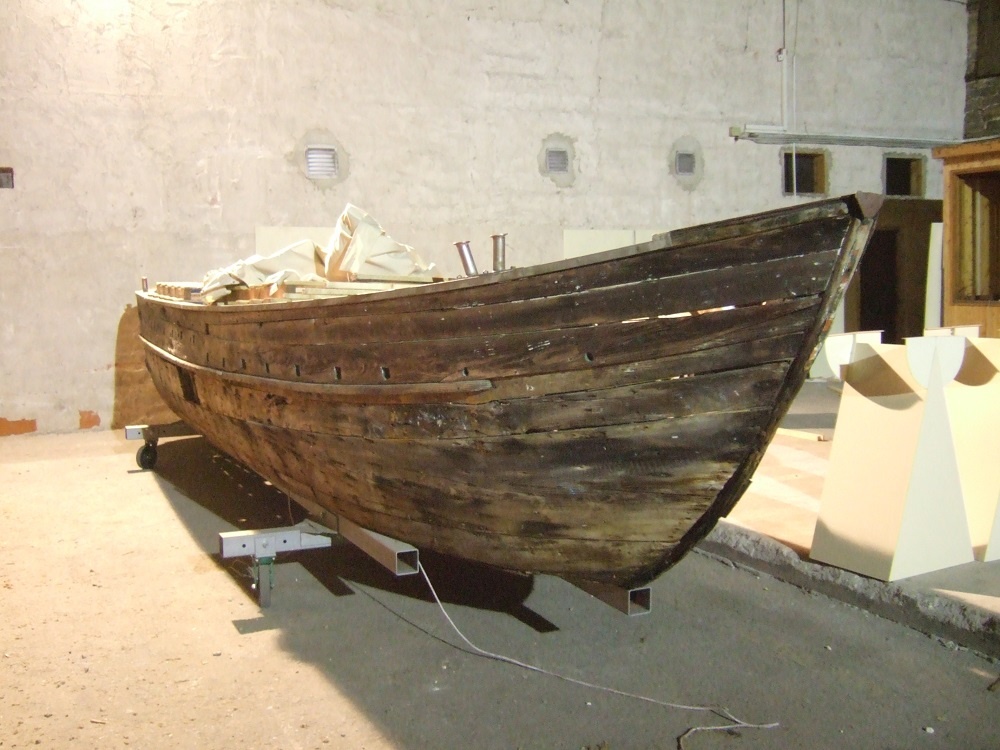
In former times, the Istrian topo was among the most widely used types of small and simple fishing vessels, utilized by fishermen for fishing in closed bays. In comparison with the Venetian and Chioggian topos, the Istrian version of this vessel was slightly firmer. Specifically, the Istrian coast offers no safe and weather-protected areas such as lagoons connected with canals between Chioggia, Venice and Grado.
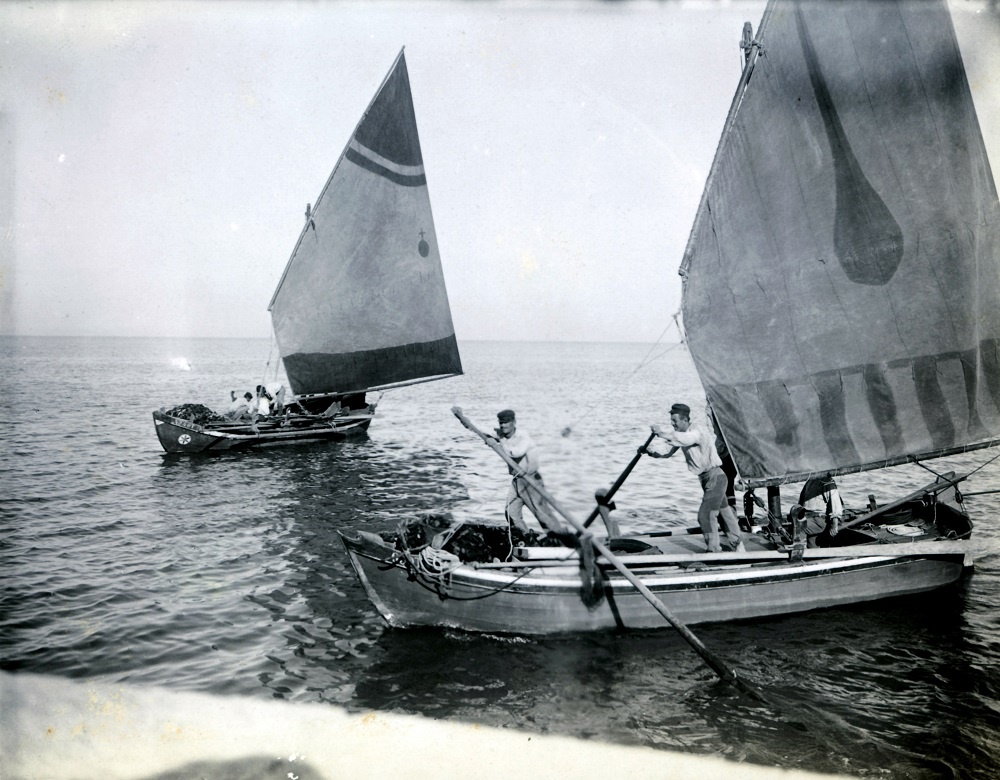
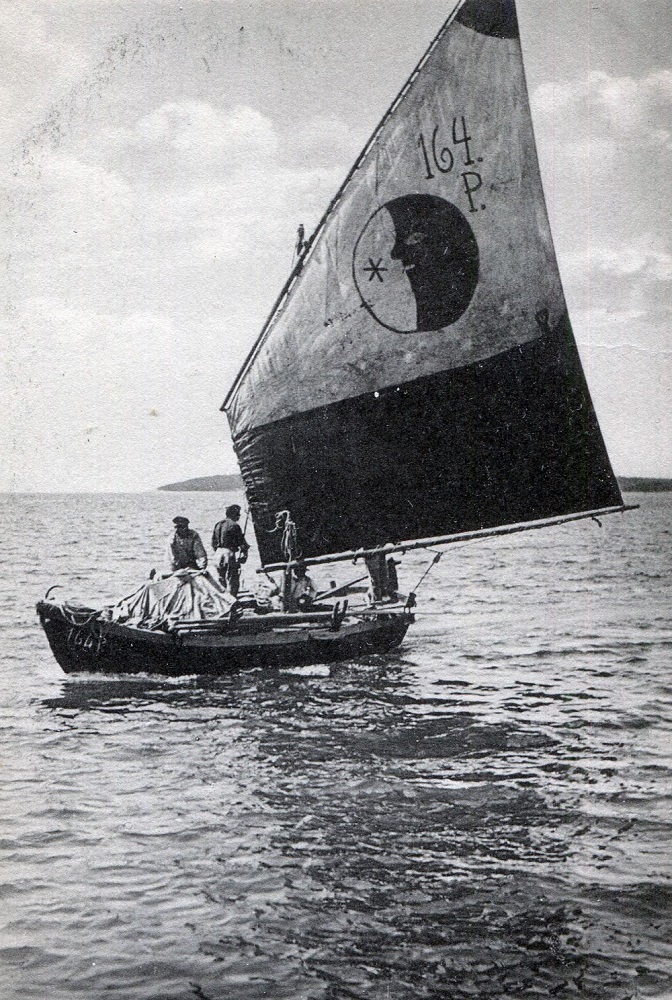
The Istrian topo is from 8 to 12 metres long vessel with flat bottom, shallow draft and wide rounded stern. Like all flat-bottomed vessels it is equipped with a large rudder that reaches well below the shallow draft. The rudder has special fittings, which enable the rudder to be lifted during navigation in shallow coastal waters such as those in saltpan canals. It is provided with one, less often two masts. Its sails include a good 40 m2 large trapezoidal sail and a smaller foresail.
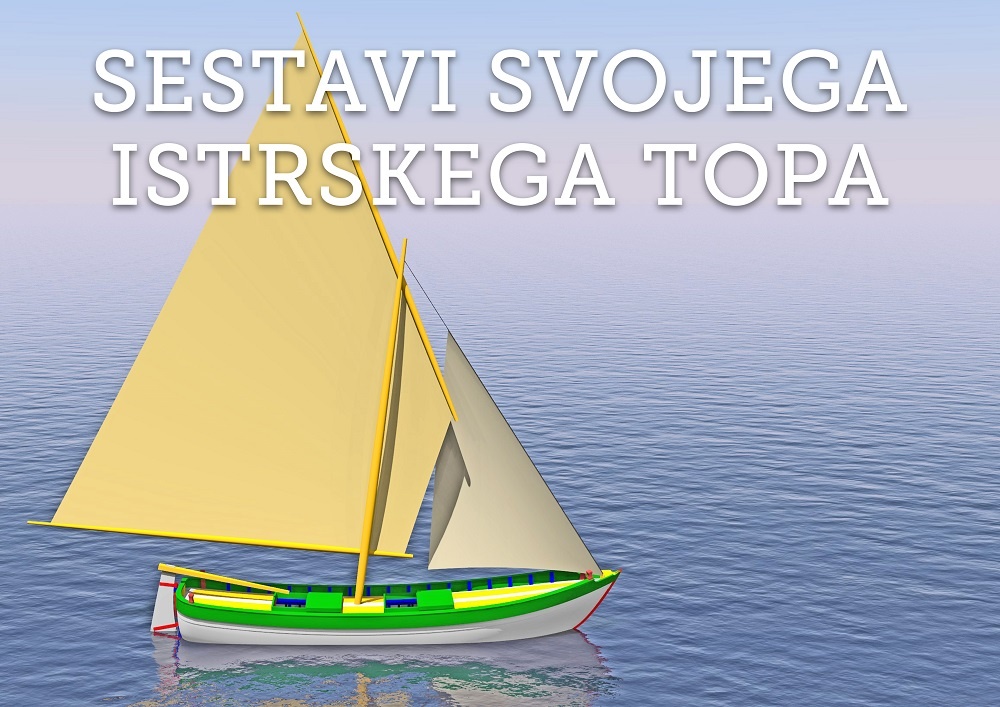
This time we shall test ourselves in the making of a paper model of the Istrian topo.
INSTRUCTIONS
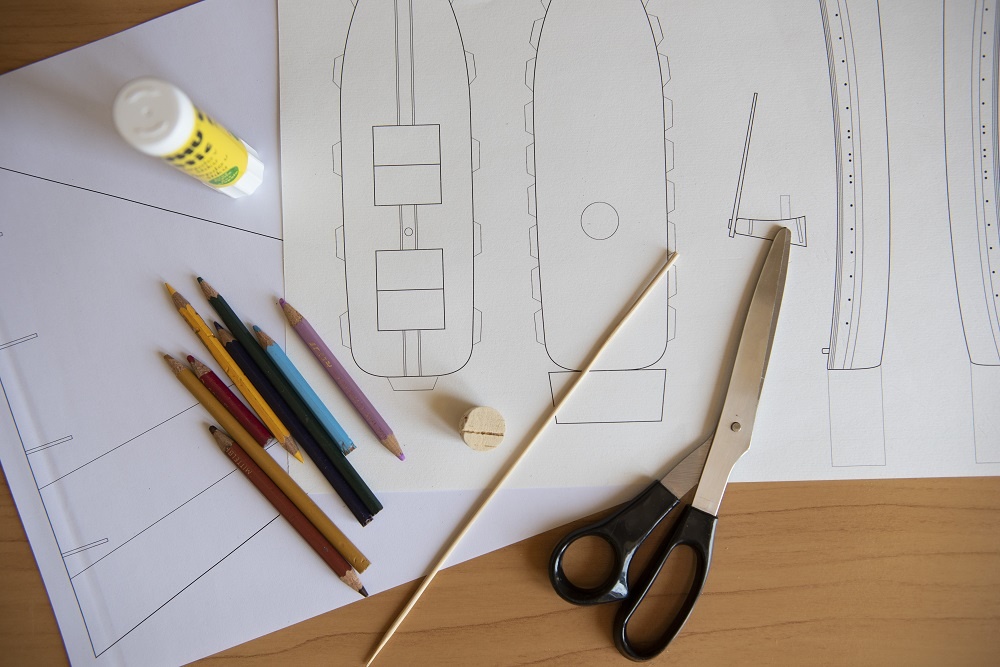
To assemble the Istrian topo model we shall need scissors, paper glue, a little wooden stick and a piece of 2 cm high cork. If we wish to paint the model, crayons shall be also needed.
Prior to the model's assembly, read the instructions carefully!
The best way is to draw the model on A3 size paper. If the plan of the model was made on a smaller paper format, the making of the model would be much more demanding. Harder paper is also recommended, such as drawing sheet or cardboard.
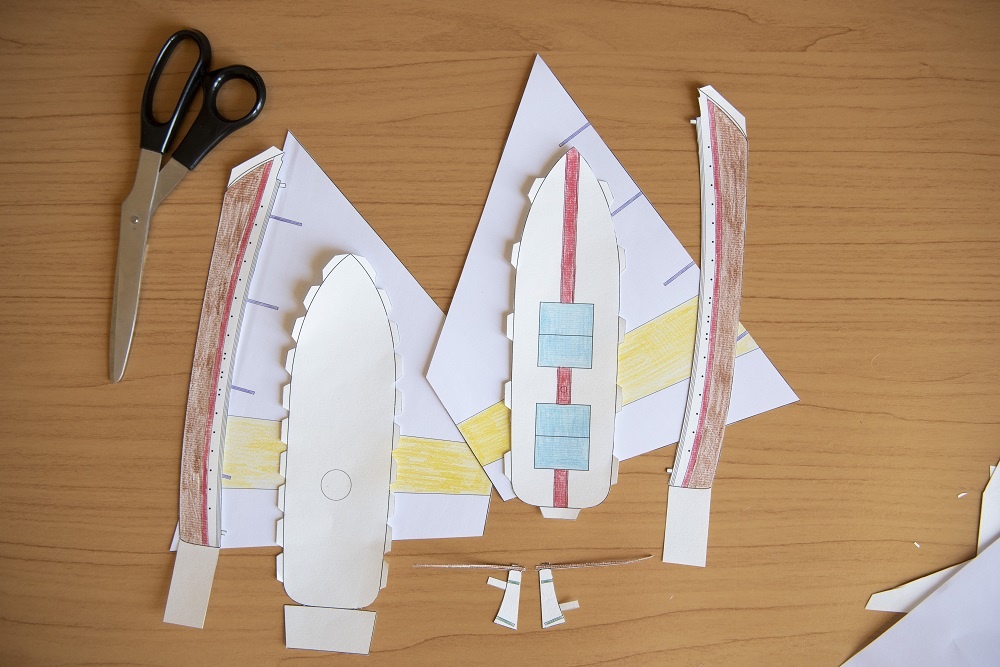
· If we decide to paint the model, this should be done prior to the cutting procedure.
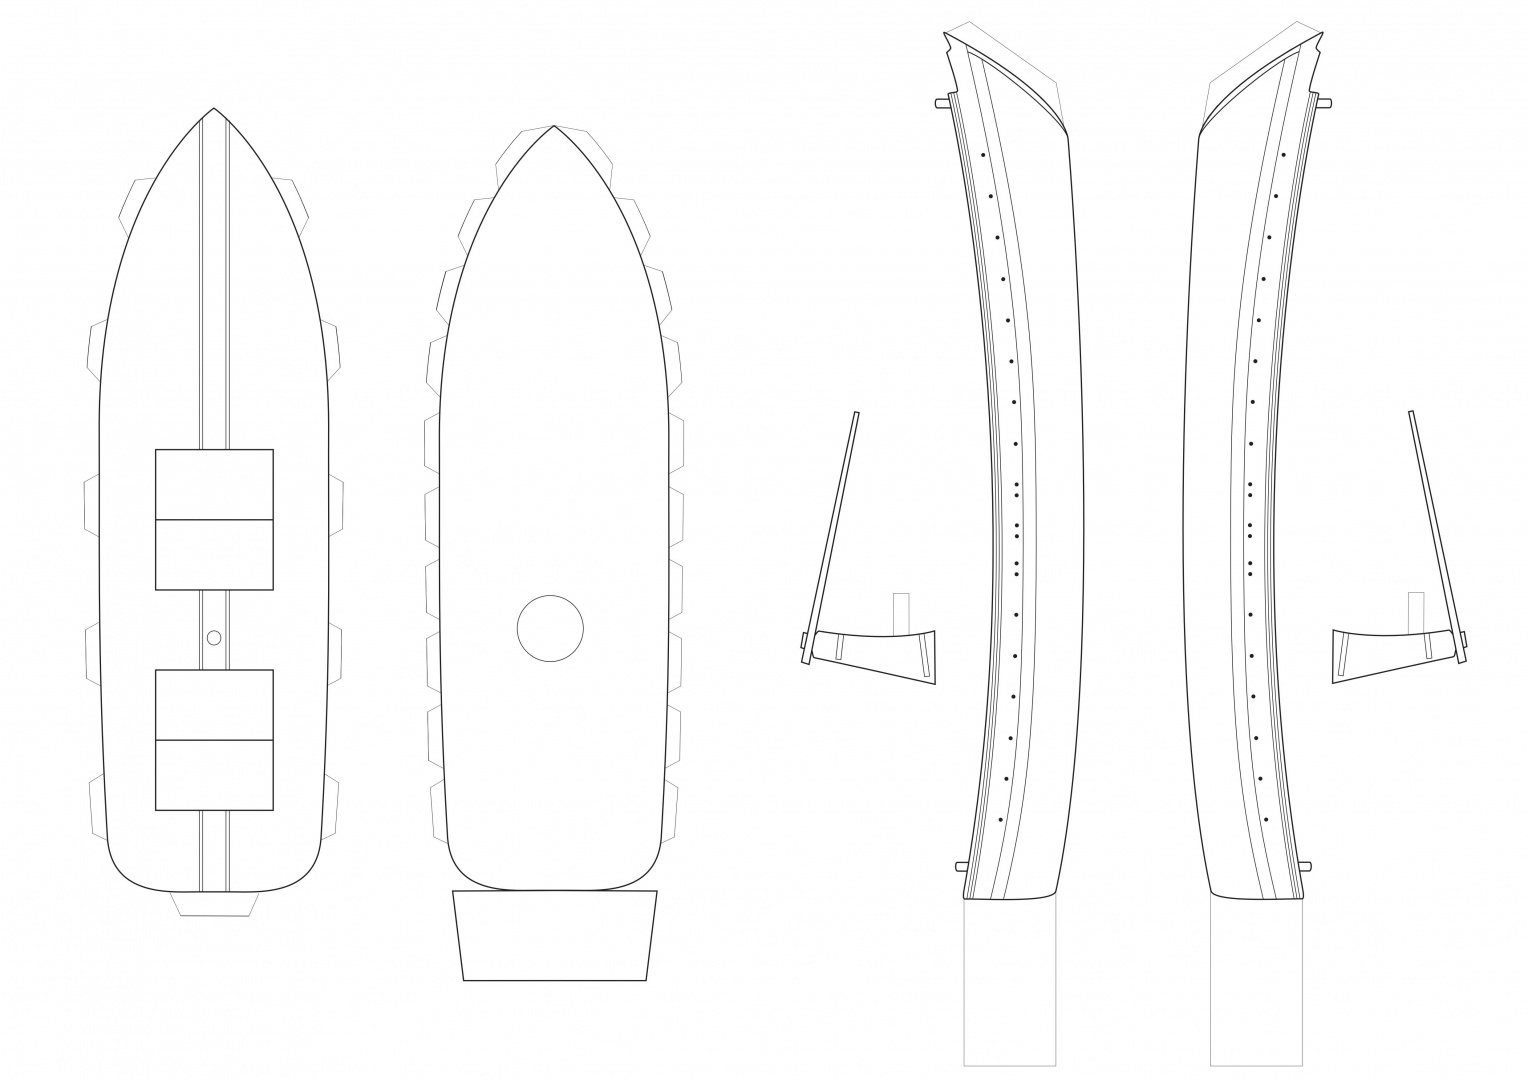
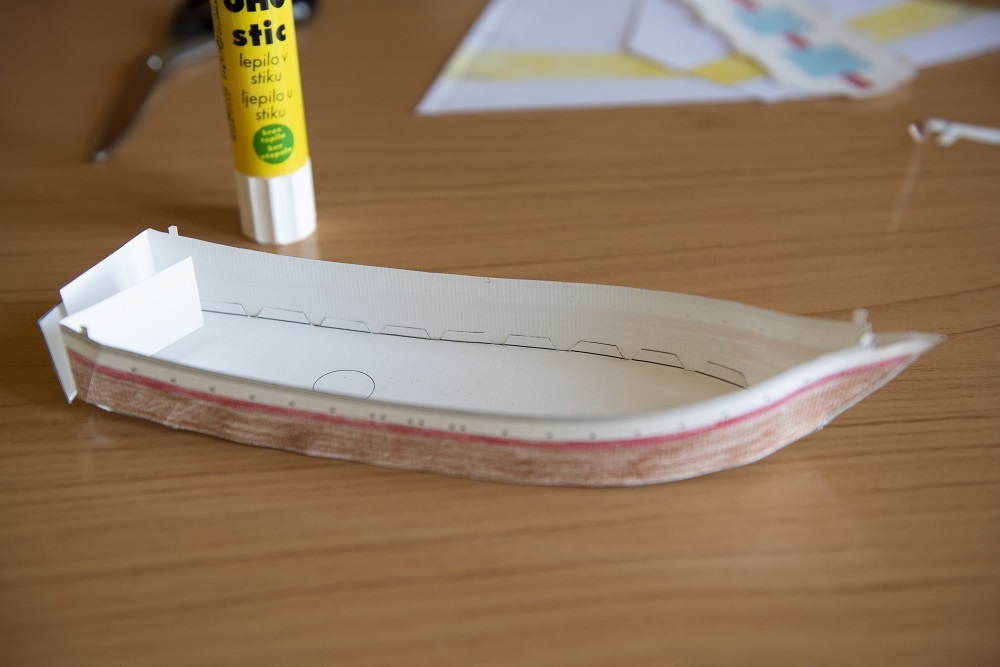
· · First of all, carefully cut out separate parts of the vessel drawn on harder paper. Take special care when making incisions in the folds which are marked with a thinner line and are needed for connecting separate parts of the vessel.
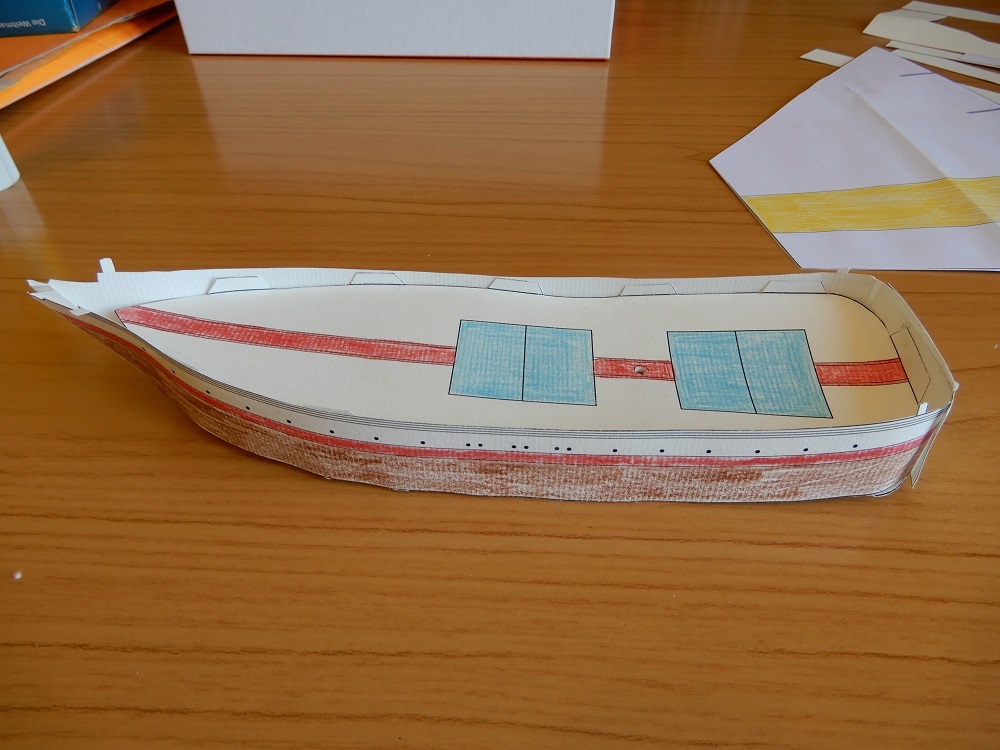
· Turn up all folds on the edge of the bottom of the vessel and on its both sides. When turning up the folds, use a ruler or a blunt knife.
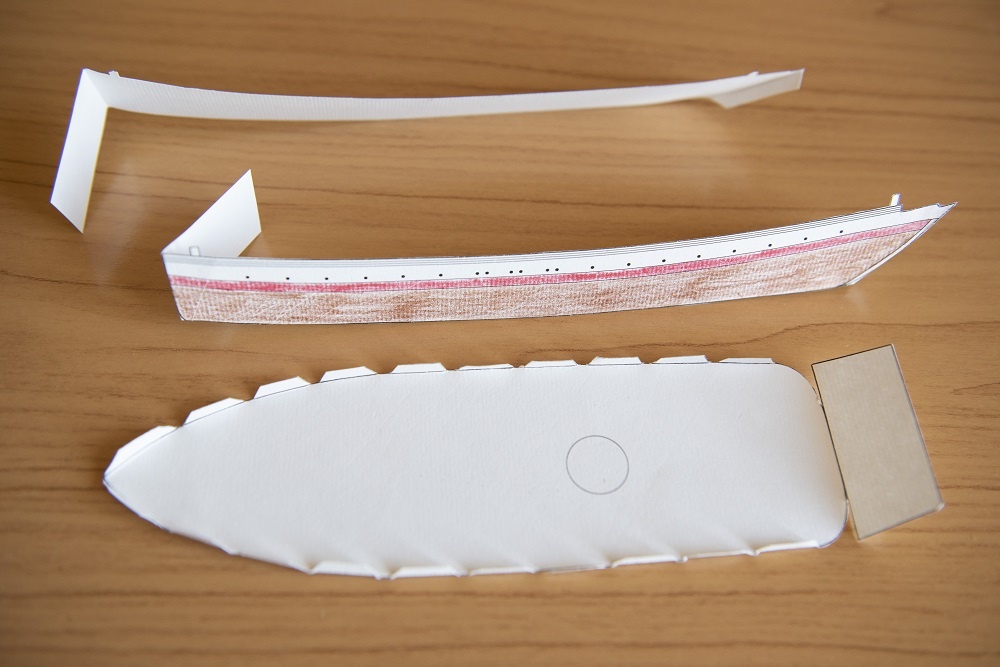
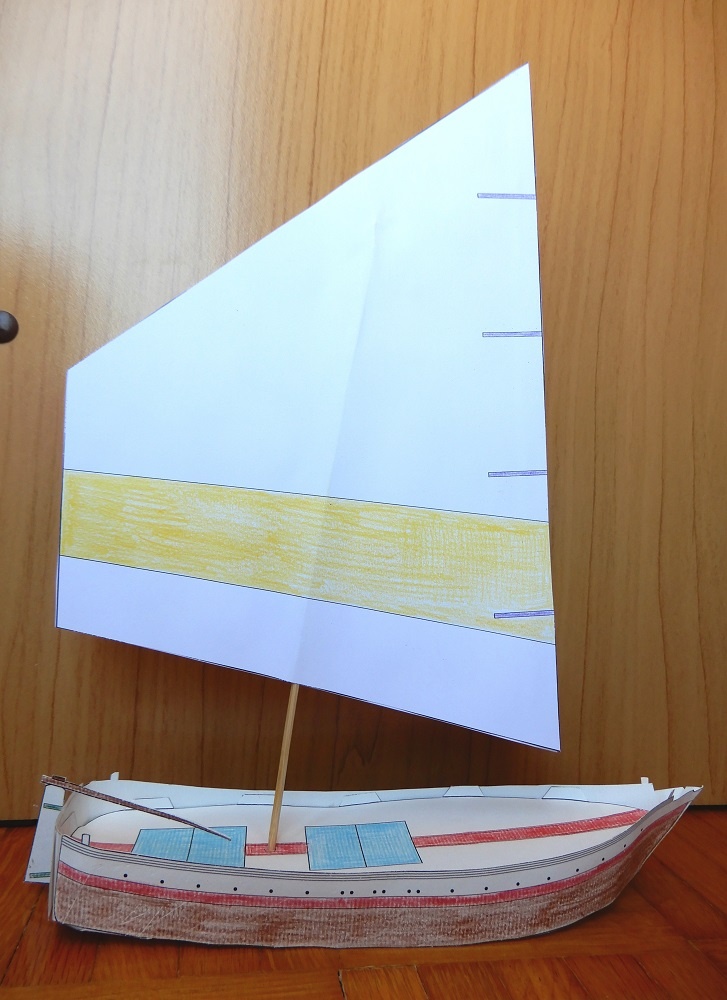
· Onto each side of the bottom of the vessel, stick one side-face each with the aid of the folds in such a way that the painted side-faces will be on the outer side of the vessel. Start the gluing procedure on the prow. The folds on the front side of the side-faces are to be turned inwards and glued together. In this way, the prow is made.
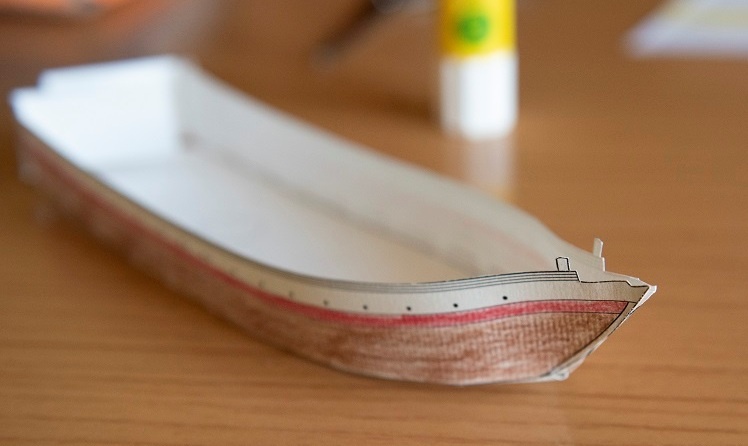
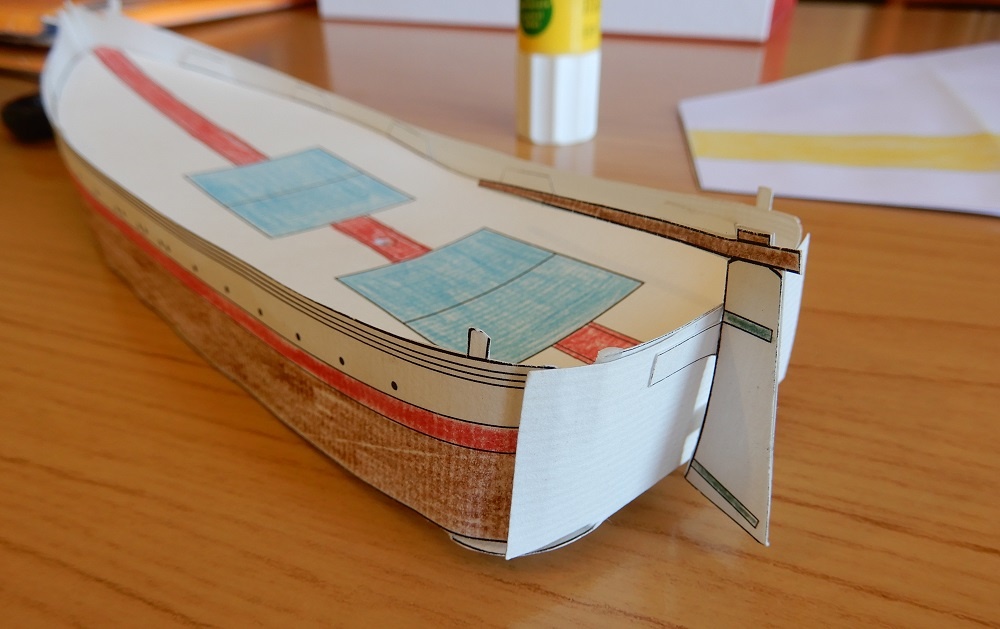
· The larger folds at the end of the side-faces are to be placed one over the other on the transom (stern) and then the stern part, which holds to the bottom of the vessel, glued over it.
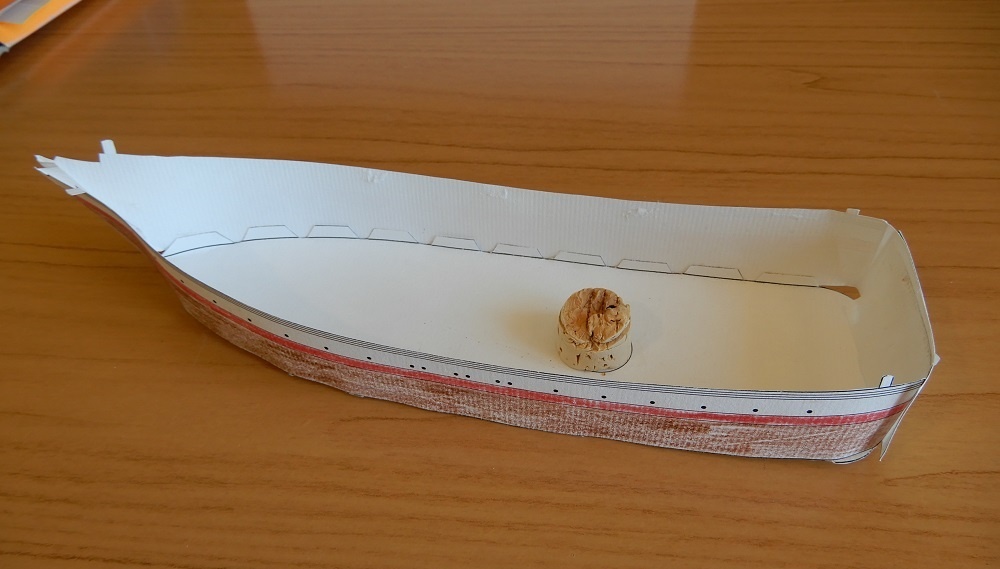
· On the spot marked with circle on the bottom of the hull, paste a piece of cork.
· Now a hole is to be cut out on the marked spot.
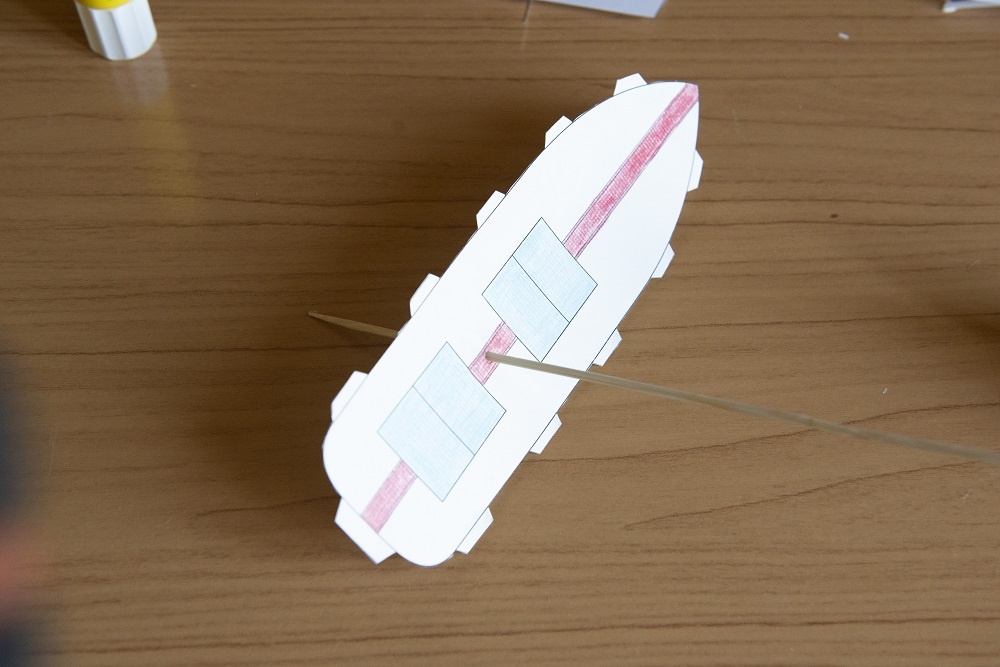
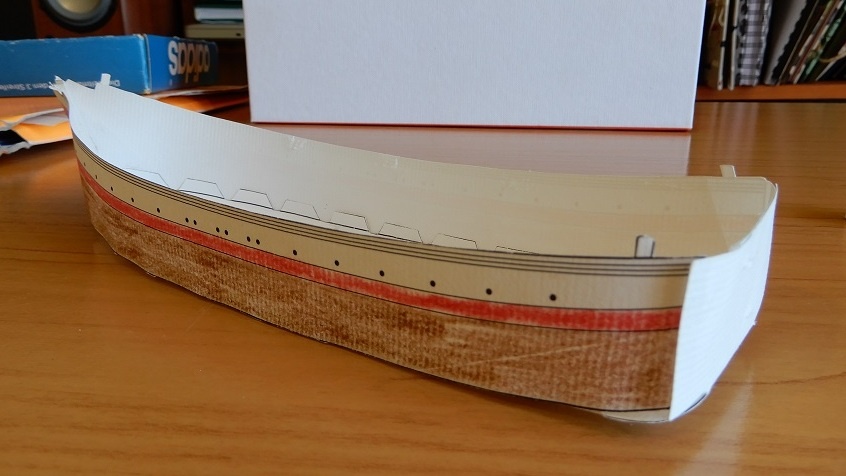
· Turn up the folds along the edges of the vessel's deck. The deck is to be fastened to the inner sides of the side-faces in such a way that the deck will be for a few millimetres lower (for the height of the folds) than the edges of the side-faces.
· Both parts of the rudder are to be glued in such a way that the drawing will be visible on both sides of the vessel. The folds of the rudder are to be turned one to the left, the other to the right and glued to the stern of the boat.
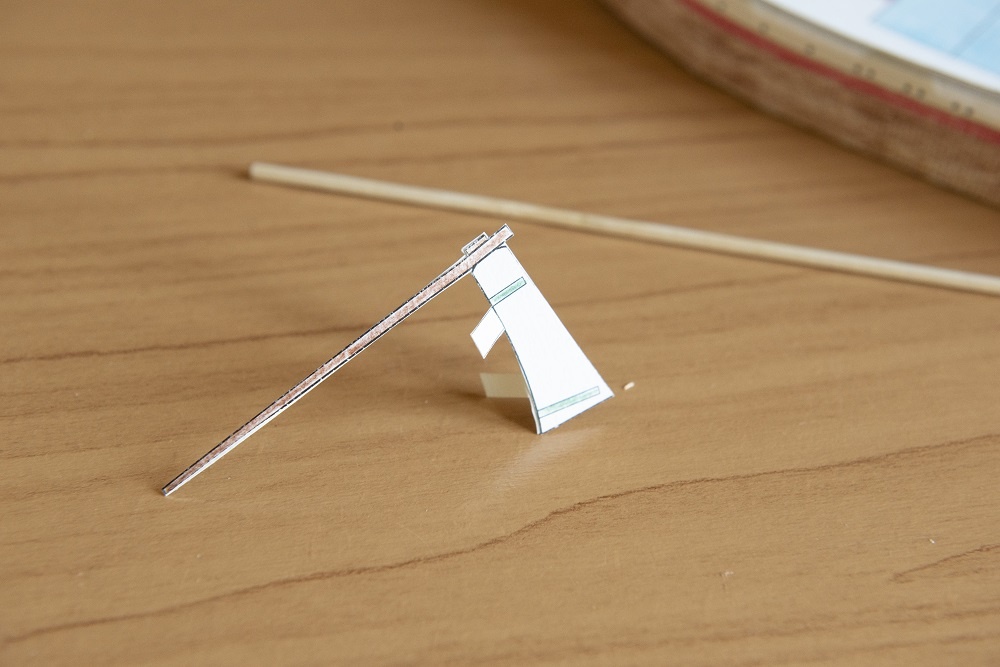
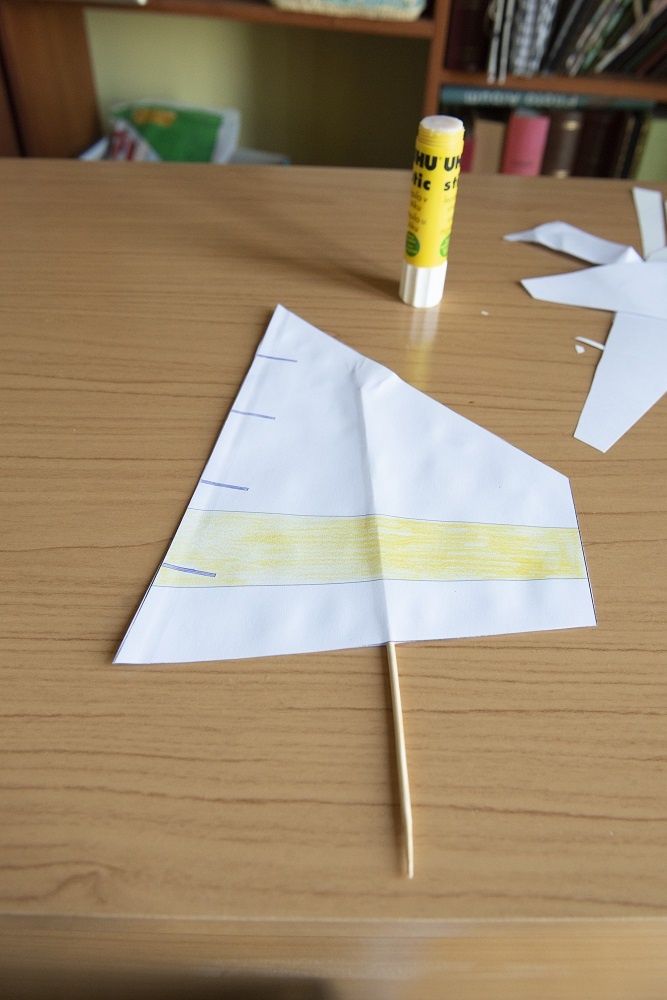
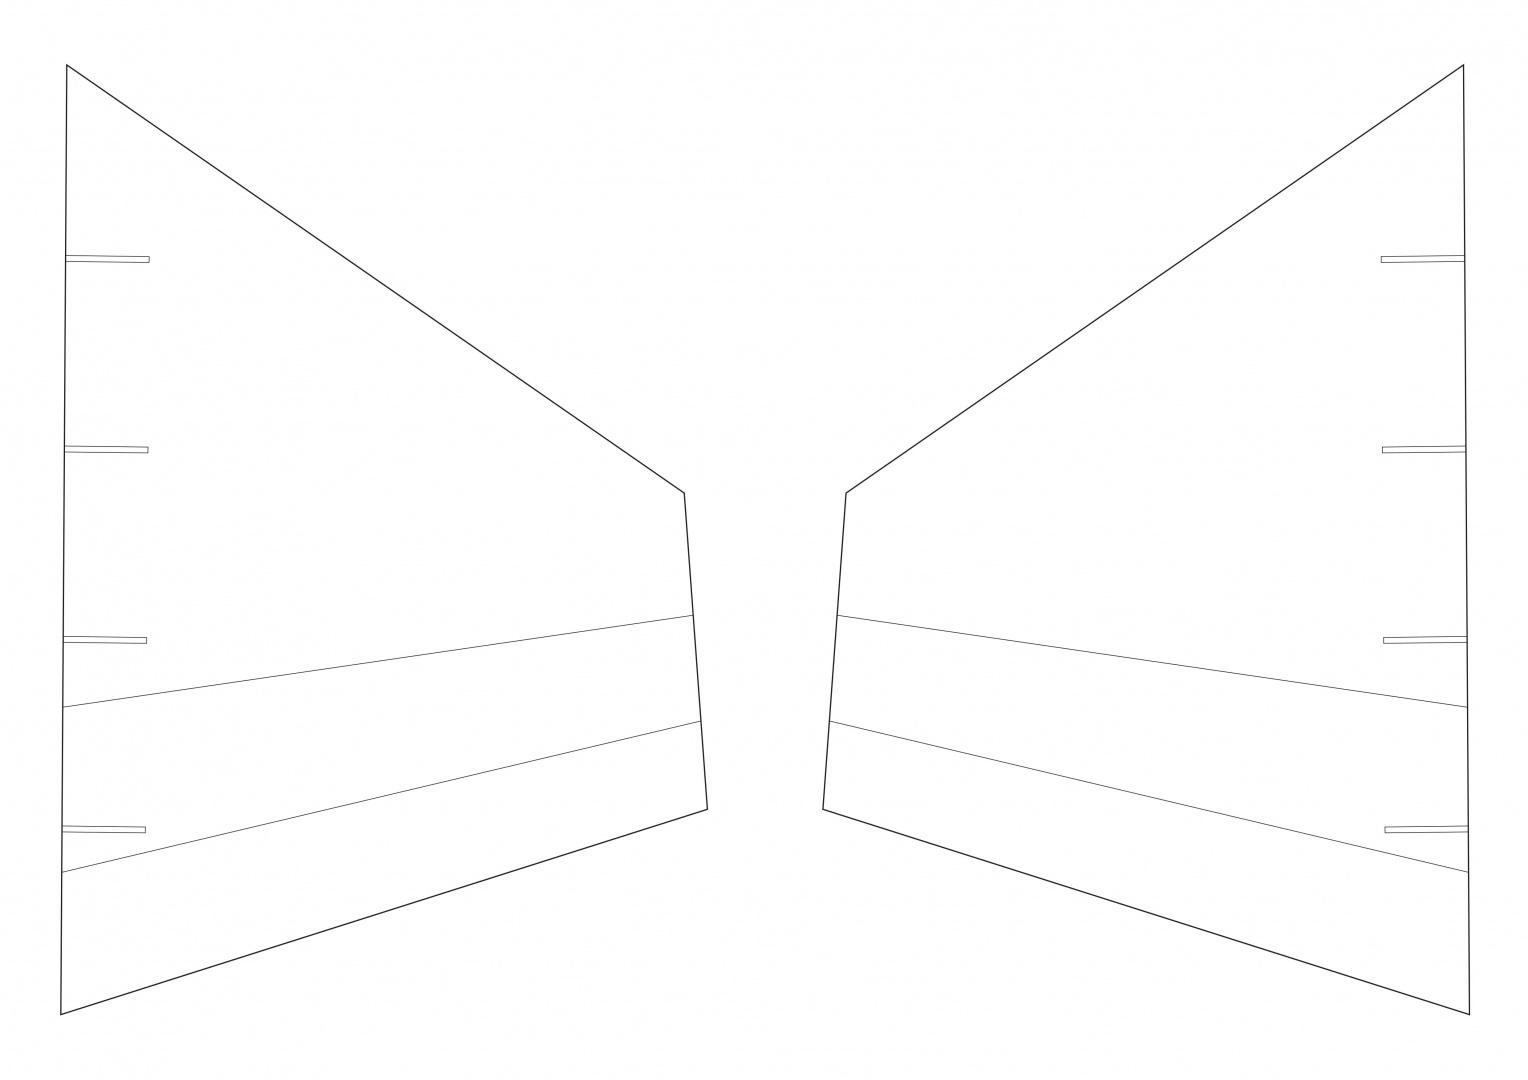
· Both parts of the sail are to be glued together in such a way that the drawing will be visible from both sides. For the mast use a wooden stick, which is to be glued inside both parts of the sail. The mast is to be then pushed through the hole in the deck and thrusted into the piece of cork, which has been prior to this procedure glued from the inner side to the bottom of the vessel.