Maritime Saturday Workshop -Let's make our own mosaic
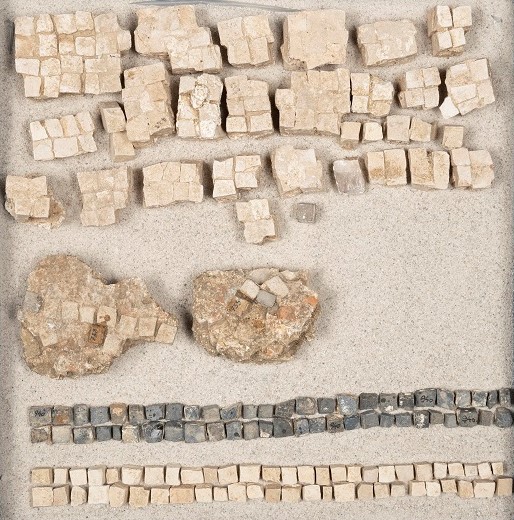
If you took a walk through the archaeological collection in the Maritime Museum, you would catch site, among other things, of the original mosaic cubes once used for covering and decorating larger surfaces.
Do you know what a mosaic is?
A mosaic is an ancient technique, which had been used in our region already by the Romans, primarily for decorating the floors and walls of their villas. Mosaics are composed of small cubes, known as tesserae, which create through certain placing different geometric or plant patterns, images of animals, people, gods or other motifs.
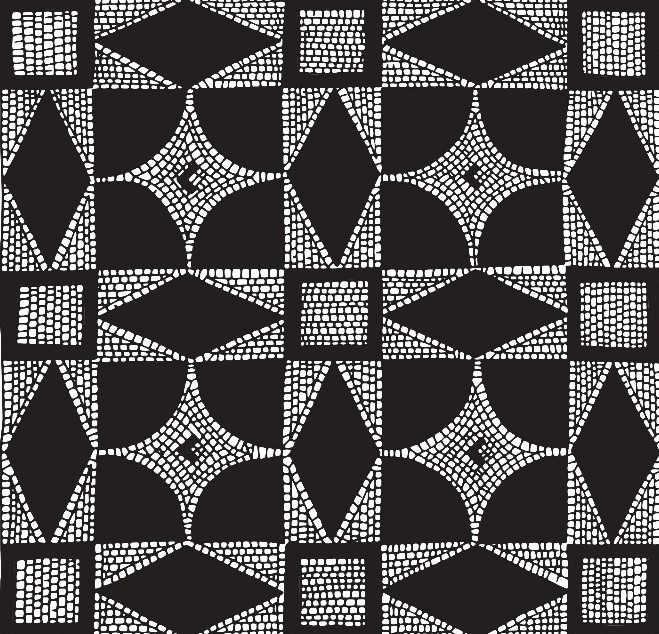
A very interesting example of a mosaic is on display in the Archaeological Park in Simonov zaliv (Simon Bay), where a Roman seaside villa used to stand some two thousand years ago.
Let's make our own mosaic!
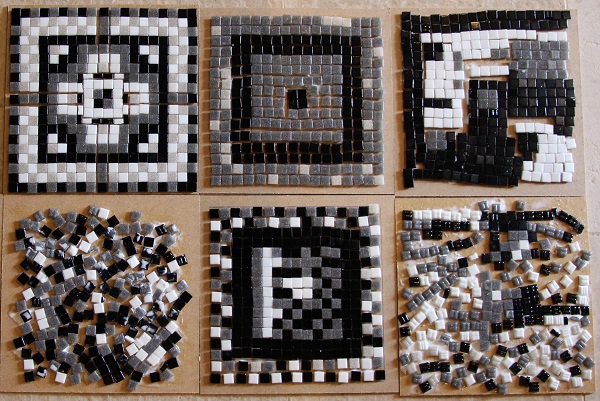
In the Maritime Museum we intended to organize, on this very day, a workshop for making a mosaic with geometric pattern composed of small black and white cubes. The products would look something like this:
At the moment, unfortunately, we are unable to implement the planned workshop, as we are all forced to stay at home. However, we can still conduct it virtually.
We shall make a mosaic with a maritime motif, using the material we all can find at home (paper, various types of packaging) and later recycling it as well.
Things we need:
- protection for the table
- a sheet of paper or cardboard for the basis
- paper and packaging
- scissors
- glue and brush
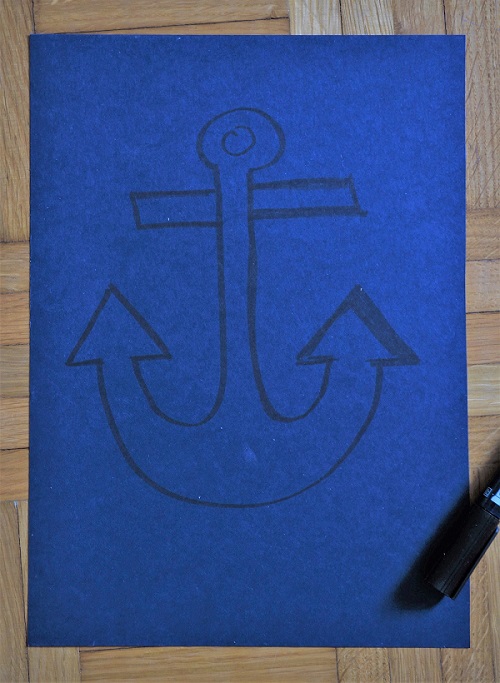
First step:
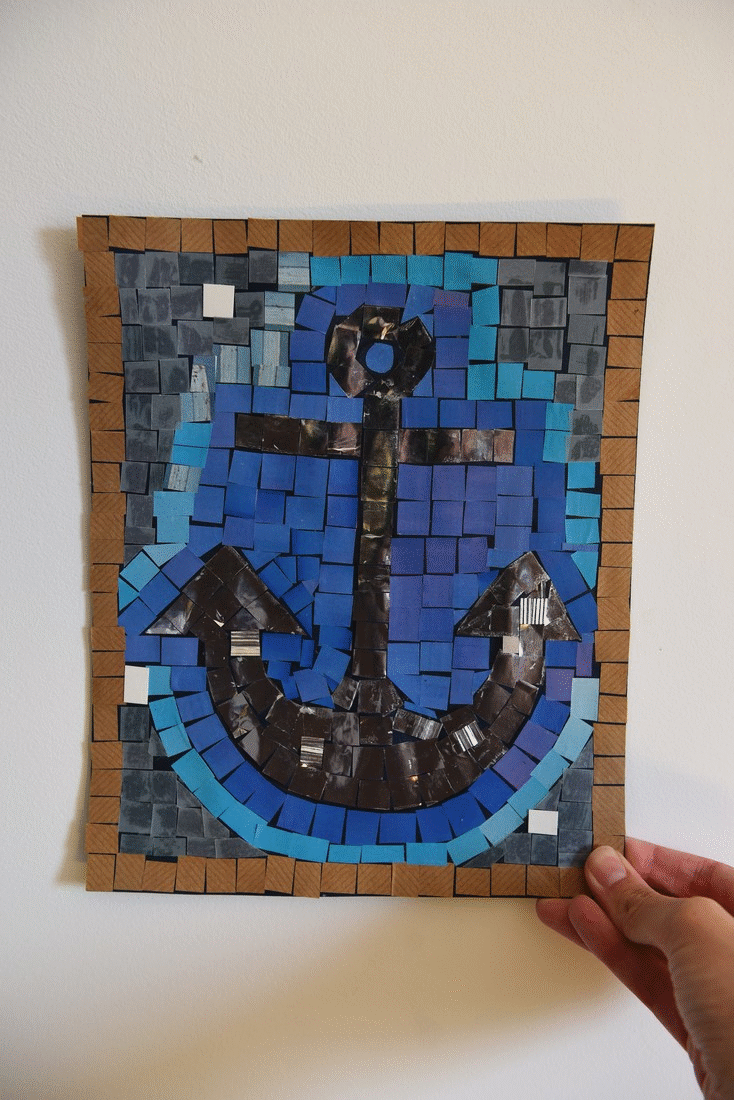
Draw the motif of a mosaic on the arbitrarily large basis. The motif should be related to the sea and maritime matters. We chose the anchor motif.
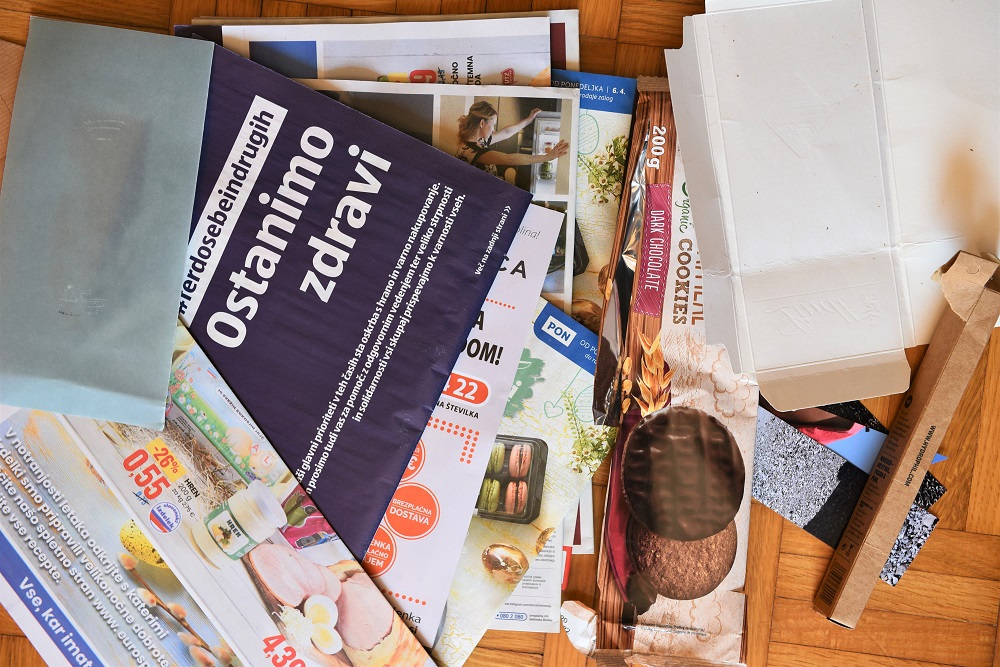
Second step:
Find an old piece of paper, for example from the advertising mail or packaging in various colours, such as different carton packages for food and beverages, wrappers or bags.
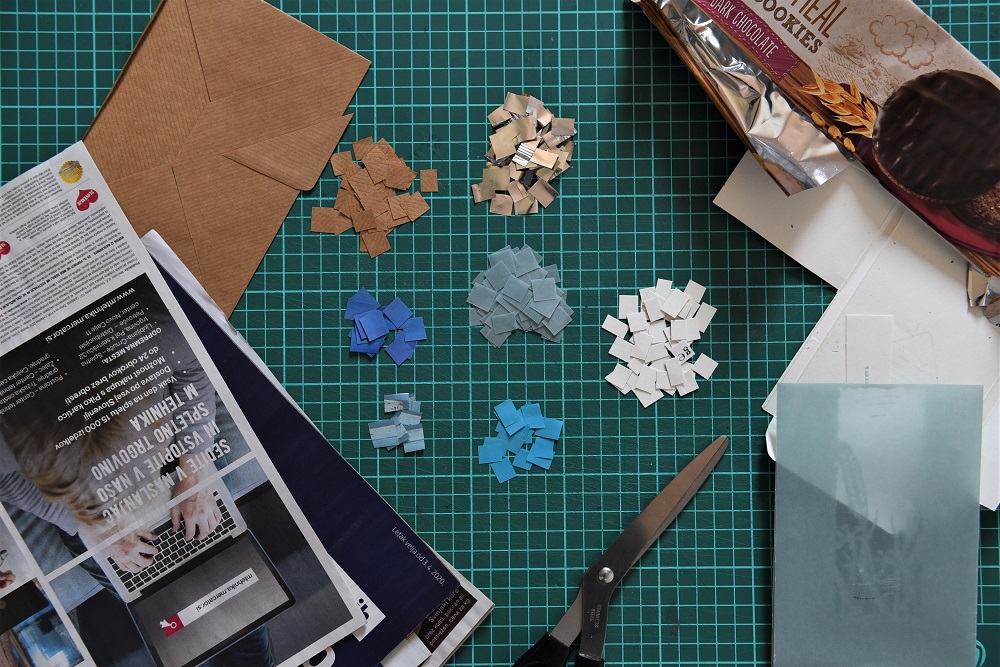
Third step:
Select the colours you wish to use in your mosaic, and cut out little squares from the chosen material. These should of approximately the same size. Keep the scissors near at hand, for you will almost certainly still need them during your work.
Fourth step:
Start with the gluing procedure. Apply glue with a brush on a part of the drawing and paste on the little squares in the chosen colours. If you need a smaller square in a certain part, cut it with the scissors to the needed size. Carry on in this fashion to the end.

Fifth step:
Take a photo of your mosaic and send it to muzej@pommuz-pi.si.
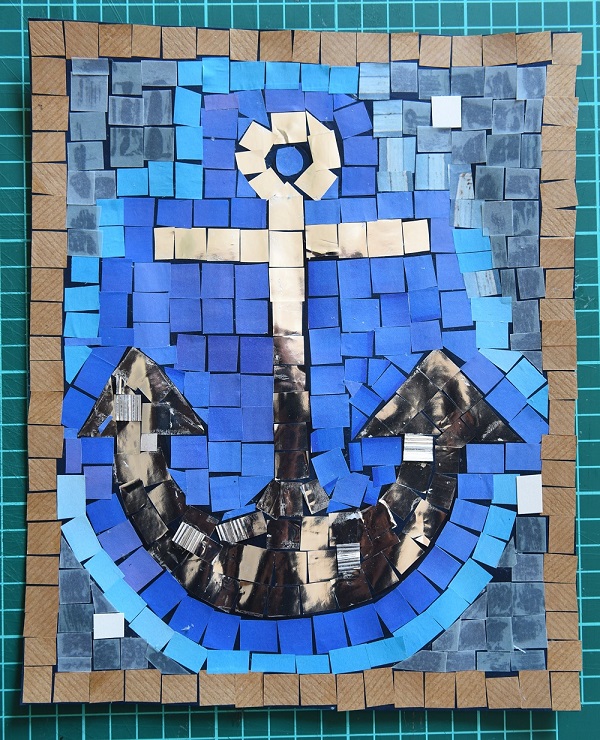
Sixth step:
Congratulations! You've done it! Now you can find a place for it: on the wall, box, notebook …